Sunday, December 11, 2011

New Posts On Their Way

It has been so long since I last provided a new post.  At the same time, so much has happened and changed that I can't wait to share it with you all.  I have some new posts and things in the works that I think you all would be so excited about!  I promise to start sharing soon.  Keep checking back for some upcoming excitement! 

Meanwhile...enjoy some laughter while I'm away creating some greatness.


Keep on Keepin on.

Thursday, July 07, 2011

Yellow Potato & Squash Curry

Lately I've been trying to cook meals that use more fresh products rather than processed foods.  One of our new favorite dishes is a curry dish I got from Kathleen.  I started with her recipe and adapted it to fit what we have hanging out in our kitchen.  I've also made it a point to shop at the Farmer's Market to get some of my goodies.

Our dinner last night - Yellow Potato & Squash Curry
 
Here is my adapted recipe:
2 cups brown rice (organic)
4 golden potatoes (local)
1/2 block of extra firm tofu (organic) - we use Melissa's Organic Extra Firm Tofu
1 yellow squash (local)
1 large white onion - or 2 small  (local)
1 -2 tbs curry power (or more to your taste)
1 can of coconut milk
1 tsp chili powder
  1. Tell Sparky to start cooking the brown rice while you're at your Barre3 class so that the rice has well over an hour to get it's cooking on.
  2. Wash and cut potatoes into fourths.  You can also cut them smaller if you want.  Boil your cut potatoes until they are tender.
  3. While the potatoes boil, drain tofu block and cut in half.  Save the other half for another day.  Chop 1/2 tofu block into chunks and fry up chunks of tofu in pan. 
  4. While the tofu fries up, wash and chop your squash and onion.  I chop my onion kind of large because I love taking big bites of onion.  Do what you want.
  5. Remove tofu from pan when it's done frying.  Throw the onion and squash into the pan with a little bit of olive oil and fry them up until the onion is all pretty and clear.
  6. Drain the potatoes and add them to the onion and squash.  Add the curry to the mixture.
  7. Step back and realize your pan is too small for what's to come and get out a big pot.  Transfer everything to the pot.  OR plan ahead better and start with a pot.
  8. Once you start smelling the curry, add the can of coconut milk and the fried tofu. 
  9. Sprinkle in the chili powder because you forgot to do it earlier.
  10. Cover and simmer for about 10 minutes.
 
Serve dish over brown rice.  Yum.  Kathleen added cashews to hers and it seems wonderful.  I have yet to scrounge up some cashews because I'm lazy and always forget.

 
Keep on Keepin on.

Wednesday, July 06, 2011

My Birthday Present

So my birthday isn't until later this month, but my wonderful husband informed me of what we are doing for my birthday.  And this totally DID NOT come about by me calling him yesterday morning and telling him exactly what he could get me for my birthday if he didn't already have something clever up his sleeve...

I'm going to see "A Chorus Line"!  EEEE!  My nerdy show choir heart is all a flutter.  Now, it's not Broadway in NYC but OKC will still get me jumping up and down and singing "One" and "Tits and Ass" and "At the Ballet".  It will be amazing and magical.    I think I have to whip out the old show choir videos from high school.  (Yes, I regularly watch "Glee" and dance around the house during some songs.)  My high school show choir did a medley of "A Chorus Line" and since then it has been one of my very very top fave muciscals of all time.


Opening " I hope I get it"

Have you seen it?  What's your favorite musical?  Or do you hate musicals?  What's your favorite song from "A Chorus Line"? 

P.S.  I always imagined that I could at least get the part of the little Connie Wong.  Am I Asian enough?  hmmmmm.... I should go rehearse.

Keep on Keepin on. 

Tuesday, July 05, 2011

Long Weekend Rundown

Sparky and I had a long holiday weekend jam-packed full of greatness.  We took advantage of the 3-day weekend by making it a 4-day weekend instead.  It was glorious.  We played hard and got a little bit of rest somewhere in there.

Our weekend consisted of (I'll try to go in order if possible):
3 barre3 workouts
140 miles of bicycling
Home depot looky-loos
Antique shopping
Being a landlord
Picking up our honeymoon travel docs
A little travel necessity shopping at Traveler's Pack
Cookout at Natalie's (YUMMM) and meeting new peeps
Random summer thunder and rain
Comforting dogs frightened by thunder
Yard work
Brunch with friends at Cafe Kacao (one of our new faves)
Naptime
Saw the movie "Bad Teacher"
Scrumptious veggie lasagna and red pepper potato soup at Saturn Grill
Delicous homemade Vegan blueberry pancakes using this recipe with almond milk and fresh blueberries
Indoor rock climbing at Rocktown
Cleaning out storage shed (ack)
Pizza at The Wedge with friends
Washing machine war
Episode of "Falling Skies" and staying up late cause we can
Washing machine shopping and amazing sales (yay!)
Ordering a veggie burger and eating two bites of beef burger (grrr)
Moving all tools from garage to storage shed (ack) to make it a tool shed (yay)
House cleaning (ack)
Playing with my label maker (woo hoo)

I think I need a nap!  What did you do this past holiday weekend?  Did you relax and get some much needed rest or did you play hard?

Keep on Keepin on.

Tuesday, June 21, 2011

Apples and Ginger Juice

Recently, I have been changing up my diet to be more healthy and conscious of what I'm actually putting in my body.  No, I'm not on a diet.  I don't believe in diets for many reasons but I won't delve into that subject because it can be a very personal and sensitive topic for many.  But, for me, I'm all about trying to do what's right and best for the one body I have and sticking to it.

My goal recently was to give up one thing until I kicked it completely and then move on to the next thing.  I started small by getting rid of my sweet-n-low in my coffee.  I did that for one week and it was no big deal AT ALL.

The following week I moved on to bigger pastures.  I decided to quit coffee...

chirp. chirp. chirp.

Yes, you heard me correctly.  I decided to try to quit coffee 3 weeks ago today.  On the 11th day, which was a Friday, I had to be at work extra early and I had a long night before.  I decided to treat myself to Starbucks on that Friday morning.  I doubt I even had half of my Soy Mocha No whip before I chunked it.  I haven't had any coffee since.  More importantly, I haven't really wanted it either.

I have replaced my morning and afternoon coffee kick with a healthier green tea and I haven't looked back.  In addition to my green tea, I have been enjoying either freshed squeezed fruit juice or a fresh fruit smoothie every single morning (all organic)...and I am so happy I made this switch from coffee.

People who know me know that I don't like juice.  I have always been anti-juice if it's pre-packaged from the store.  I'm not a fan of all the sugars, flavoring, and food dyes (to name a few reasons) in juice and just prefer fresh organic juice.  My go-to fruit juices so far are straight organic orange juice -YUM to the max - or an organic apples and ginger juice.  There are some other fresh juice recipes I am looking at to try but I'll let you know when that time comes. 


The apples & ginger juice is such a random combination (or at least to me it was at first) but I absolutely love everything about it.  Apples and ginger root separately each have great health benefits.  Here are 15 Health Benefits to eating Apples and here are 10 Health Benefits of Ginger.  Those are just two weblinks I found but there is probably a plethora of information out there for you to pick and choose what you think is right.  As for me, I think it's better for me than coffee and it tastes dee-lish. 

Apples and Ginger
2 Granny Smith Apples
A little bit of ginger root

For my juicer, I cut the Granny Smith Apples into fourths and then drop each fourth into the machine to be juiced.  Half way through I add the ginger root into the juicer to be juiced.  Ginger root is very strong so not much is needed to get the taste.  The ginger will definitely give the apple juice a nice kick or spice so depending on your tastes, start small and work your way up if so desired.  I prefer just about a 1/2 inch (or smaller) cut while Sparky prefers at least double that amount.


Isn't Sparky a great hand model?

I'm going to whiz the juice!  - name that movie...


Wonderful tart granny smith juice with a kick of ginger. 


Sometimes I'll add in some strawberries or mix the oranges and apples together.  They are all super yummy.  Also, you can see the appx size of ginger cut in this photo.

I guess since I've kicked coffee I need to find the next thing to kick.  I've actually already started kicking something else and I'll fill you in once I've done more research on it.

Keep on Keepin on.

Monday, June 20, 2011

Inspiration: Kitchens

I have been dreaming of a new kitchen for a long time.  I frequently pine over other blogs and websites that feature beautifully renovated kitchens.  Oh to have new functional cabinets and more storage for organization.  sigh.

Sparky and I have two rooms in our house that need some serious reno-love.  The master bath and our kitchen.  The master bath is smaller so Sparky says that room needs to be done first because it will be "easier".  We'll see about that very soon.  Plus, we need to save up valuable green stuff before we can start renovating the kitchen.  blah.

blah blah blah blah. 

I want a new kitchen.

Realistically, I know I will probably have to wait about two years before we get the kitchen up to par...so I guess I'll just dream and drool at all other's luckier than I.  In the mean time, I'm contemplating doing my own psuedo-lite transformation.  I little sanding, paint, and re-organization never hurt anything right??

Enjoy some of my dreamy kitchens.


I love the wood counter top and white cabinets...oh, and maybe the beautiful retro fridge!!  Oh, dear.  I love that thing.  She needs to be mine.


I don't think I can love a kitchen more than this one.  This is my fave by far.  I love the ceiling beams, the white subway tile, the farm sink, the island with the wood counter top, and the white wood floors.  Love love love love.


I love all the tile on the walls and the farm sink.  Even though this kitchen isn't my style, I do like the contrasting island color to the rest of the cabinets.  I do love the metal bar stools too!


Keep on Keepin on.

Saturday, June 18, 2011

Handmade Hanging Planter Boxes

A few months ago, Sparky and I were perusing one of our local greenhouses when I spotted a super cute and simple hanging planter.  I am not normally one for hanging flower planters but I really liked the one I saw that day.  It had a modern and Asian feel to it.  It was just wooden slats stacked to form a box.  The problem?  It was pricey...and I didn't really care for the flowers already in it.  I was contemplating getting it because I like it that much and I rarely like things very much.  Then Sparky set himself up by saying, "I could totally make that.  That's a rip-off."  So, I held him to it.  He made me the super simple, modern, Asian-feel hanging planters...all for free!

Luckily Sparky has a bunch of random crap laying around in our garage.  I don't know what half the stuff is and I prefer it that way.  If I start getting up all in his business then I will take control of it and it's best if I just let him have his garage crap the way it is...with a few minor must-have's and have-not's for the Mrs.  

Items used:
Wooden Stakes
Metal chain
Electrical Wire

Tools used:
Hand saw
Straight Edge
Pen
Drill
2 pliers

Sparky had a box of wooden stakes leftover from a cycling race that was just taking up space in our garage.  They were perfect for this project!  I'm sure you can find the amount of wooden pieces or stakes at your local home improvement store.  I wouldn't doubt it if these particular stakes came from Lowes or Home Depot.


Sparky started by cutting all the wooden stakes' sharp points off and also cutting the stakes to the desired size. 

Sparky then lined 15 stakes together.  He used a leveler for his straight edge to draw a straight line across all the stakes.  This line is the spot on each stake that a hole will need to be drilled.  He then repeated this step on the other end of the stakes so that there are two parallel lines.


Sparky then drilled a hole in each stake at each end where the line was drawn.  He tried to get it as center as possible on on each stake.


The next step was to start stacking the stakes in a square shape and to line up the holes as best as he could.


After the stakes were stacked to our desired height, Sparky then used the wire to snake through all the holes and tie all the stakes together.  He used pliers to cut the electrical wire.

When all four sides corners were tied, Sparky then took 5 more stakes and drilled them to the bottom of the box leaving spaces in between each stake to allow for future drainage.

Sparky had a bunch of this random metal chain laying in the garage.  He measured out the length from one corner diagonally to the other corner and guessed how much extra link would be needed to hang the planter.  He un-linked the chain (using two pliers) at the desired spot and then measured out an identical length for the other diagonal.


He then linked the chain to the electrical wire and tightened them together.  He repeated on all four corners.


Voila.

Free handmade hanging planters using materials already owned.  Sparky made a total of four boxes in about 1 hour. 

We used moss at the bottom of the planter so that dirt would not fall through the spaces.  It also gives it a nice look with little bits of moss peaking out of the little slats.

*Yes, my flowers are dying.  It's been hot and I have a black thumb.  I've moved the flowers into the shade to see if I can save the poor babies.

Keep on Keepin on.

Thursday, June 02, 2011

Herb Garden

This year I decided I wanted to try having an herb garden.  Sparky and I normally go all out with our homemade garden every Spring, filling it with various tomatoes, peppers, cucumbers and a fruit here and there.  We haven't been too lucky in the vegetable garden department since last year's hail storm wiped ours out completely and we never really recuperated our garden afterwards.  So, this year we decided to go a little lighter with only two tomato plants, some green bell peppers, banana pepper, and a cucumber plant.  I just can't give up on my cucumbers.  And then we decided to add a few herbs to see how that works out for us too.  The herbs we planted were Lemon Thyme, Italian Oregano, Sweet Basil, Curled Parsley, and English Lavender.


Sparky does such a good job of planting all of our goodies.

He's such a hard little worker.

Lemon Thyme

Italian Oregano


Sweet Basil

Curled Parsley

English Lavender

And there is always a dog to inspect sniff out the work. 

And if you are wondering what is in the hay bale...it is the tomato plants.  Sparky is testing out the hay bale idea again.  To plant your goodie of choice:

1.  Decide where in the hay bale you want to plant your goodie.  Dig out (or in Sparky's case, rip out) a hole in that place about half-way or a slightly more down the inside of the hay bale.
2.  Fill the hole with gardening soil.
3.  Plant your goodie!


Also, Sparky's sunflowers are growing like crazy!


And don't forget to feed your goodies!

Speaking of feeding...I can't wait to try some of my new herbs on a homemade pizza!  I've found the best quick and easy pizza dough recipe that I will share very soon!

Keep on Keepin on.

Monday, May 30, 2011

Mini Banana Muffins

One of my favorite and relaxing hobbies is baking.  Unfortunately, I really only know how to bake banana bread.  Why?  Because I end up having to bake a banana something all the time.  You see...I have a really odd love-hate relationship with bananas.  I LOVE bananas when they aren't ripe.  In fact, green means good in this case.  I buy and eat bananas green and once they get one little bruise on them I am out.  So, I normally have a few bananas leftover that aren't "good" anymore.

I either give the little bruisers away or bake them.

This morning I had three bananas sitting on my kitchen counter...all nasty and not edible on their own.  I sighed and decided to take on baking them first thing this morning.  I decided to skip my routine banana bread loaf and use my new mini muffin pan.  (Everything is better mini, right?)  I have one go-to recipe for my banana breads that I love.  I'm continually trying to tweak it to make it more organic and healthy.  Below is what I actually made this morning.

Mini Banana Muffins

1 1/2 cup Organic Whole Wheat Flour
1 teaspoon baking soda
1/2 teaspoon cinnamon
1/2 cup melted butter (I use Smart Balance Butter light with flax)
3/4 cup Organic Pure Cane Sugar
2 Organic Eggs
3 Organic Ripe Bananas mashed
1 teaspoon vanilla
* white chocolate chips
* coconut flakes

Preheat oven to 325F degrees.

In a mixing bowl, cream together the melted butter and sugar.  Add the eggs, mashed bananas and vanilla and mix really well.

Mix in the baking soda and cinnamon.  Then slowly pour in the flower, mixing well as you pour.  Give the mixture a really good stir to make sure everything is fully mixed and then stir in the your treat of choice.  (white chocolate chips, coconut flakes, nuts, blueberries).

Lightly grease or oil your baking cups.  Spoon your mixture into the cups.  Bake at 325F degrees for about 20 minutes.

*I actually poured out a little but of the mixture into a separate bowl and added the coconut flakes.  I also spooned the plain banana mixture into the cups and then added a few white chocolate chips to about half of the plain muffins.  I ended up with a few plain banana muffins, a few white chocolate banana muffins, and banana coconut muffins.  YUM-O.  Sparky was pleasantly surprised when he stumbled out of bed to the aroma of baking banana muffins.

In the future, I am going to try to incorporate Agave Nectar, Xanthum Gum, and coconut oil.  I will let you know how that goes.


Scenes from my morning.  Enjoying my muffins, coffee, flowers, and dogs.


*All photos belong to me, yo.

Keep on Keepin On.

Friday, May 06, 2011

Planter Boxes

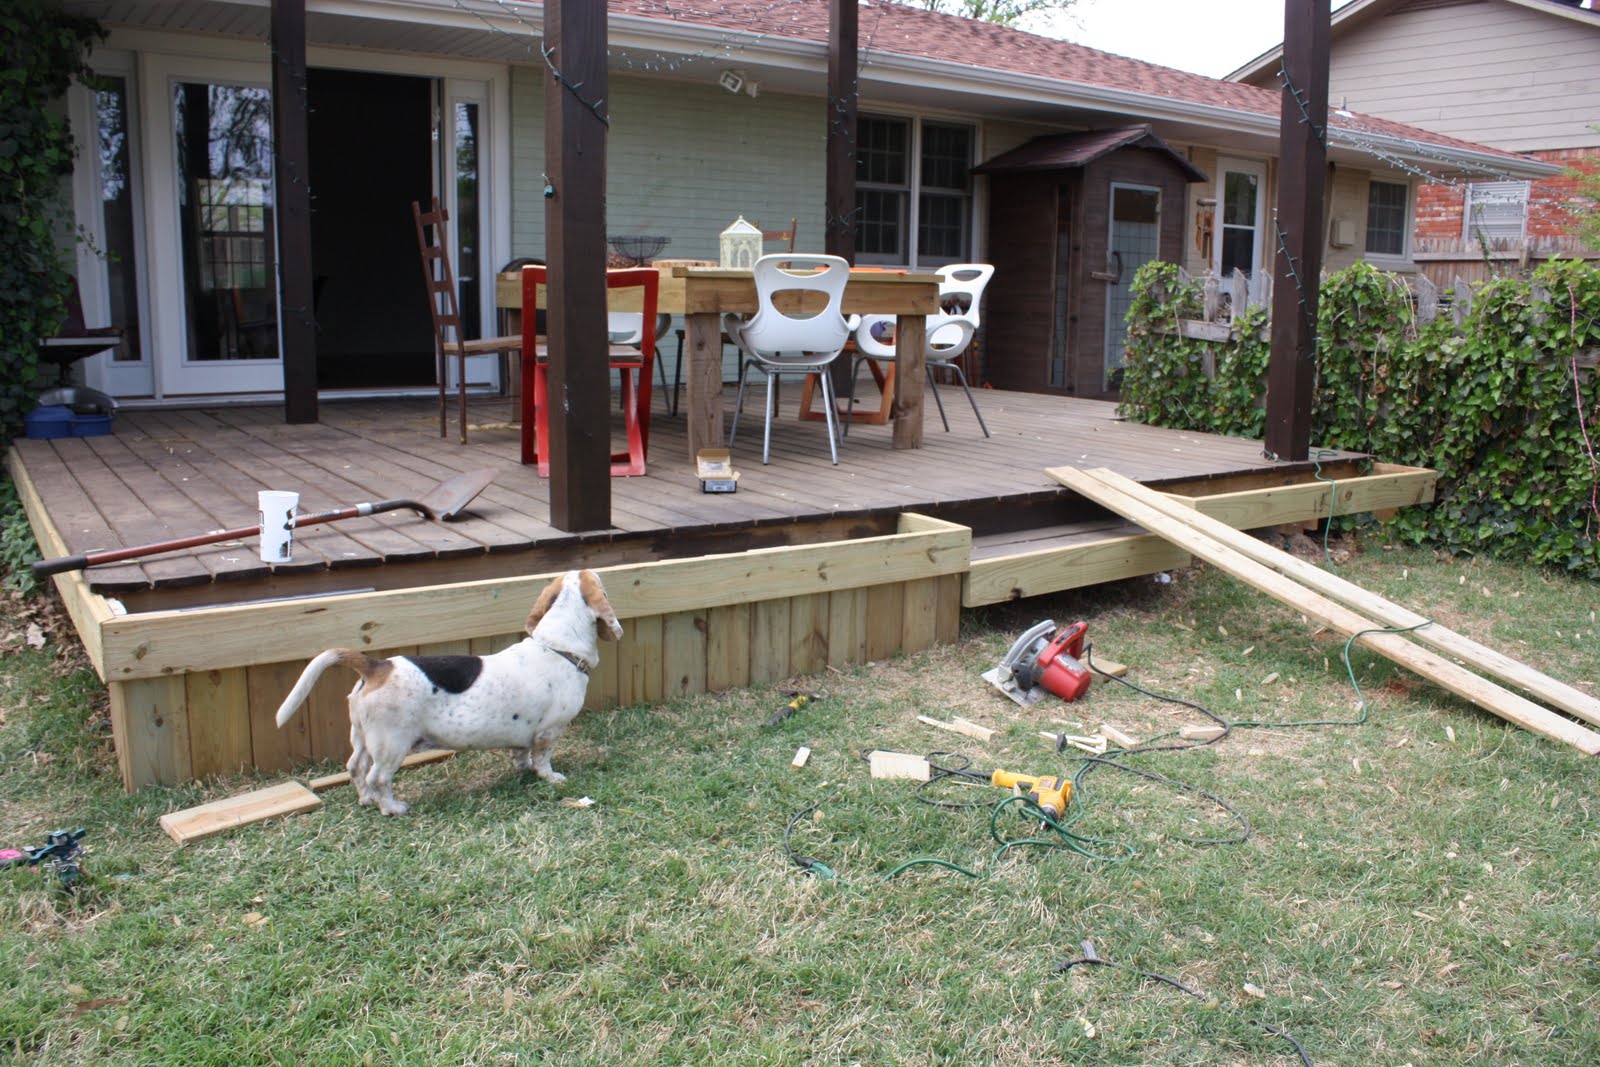
The Start.  You can see that Sparky had already stained the deck and the "big" pergola.  The front was left alone after the "vision" of planters popped in Sparky's head and he was determined to build large planter boxes on the front of the deck.


Sparky first started  by building a frame along the already existing step.  We had so much left over decking wood from the deck and pergola that we just used it for these planter boxes. 

One large piece of wood was cut to fit the exact size of the very font of the step.  The two side pieces were cut to size but also each end was cut at an angle.  Sparky drilled decking screws into the pieces to attach.


Be sure to have your Project Manager "on deck" to oversee your work as you go.  


Sparky measured and cut one piece of wood the length from one end to end.  He then cut each end at an angle to match up with the previously cut side pieces already anchored and cut at an angle.  Sparky drilled decking screws to attach the pieces.


Sparky then repeated these same steps for the left side of the deck on the other side of the step.  The left side is longer than the right side, so he was sure to measure each separately to meet each sides' specifications. 

He then started the bottoms.  The main frames of the planter boxes are floating, leaving a large space between the frame and the ground.  Sparky went back and fourth between wood and galvanized metal to fill this space.  He wanted a modern look.  The galvanized metal was a great idea, but the in the end, the wood "legs" won.  We already had the wood and the wood was more structurally supporting.  Plus, if we decide later to do the galvanized metal, we can always screw the metal into the wood and then remove again if we choose that too.  It's win win this way.

The "legs" were accomplished by just taking the long decking wood and cutting to the height needed.  It doesn't have to be absolutely perfect because they will eventually be covered at the top.

You can also see here that Sparky is attaching a back deck board to close of the box in the back.

Be sure your Project Manager approves all decisions.  They have to at least feel involved throughout the process.


Be sure to make a mess.


Take a break without informing your Quality Control Manager.  Leaving them dumbfounded about your whereabouts is always fun.


Repeat the bottom slats to the other side.


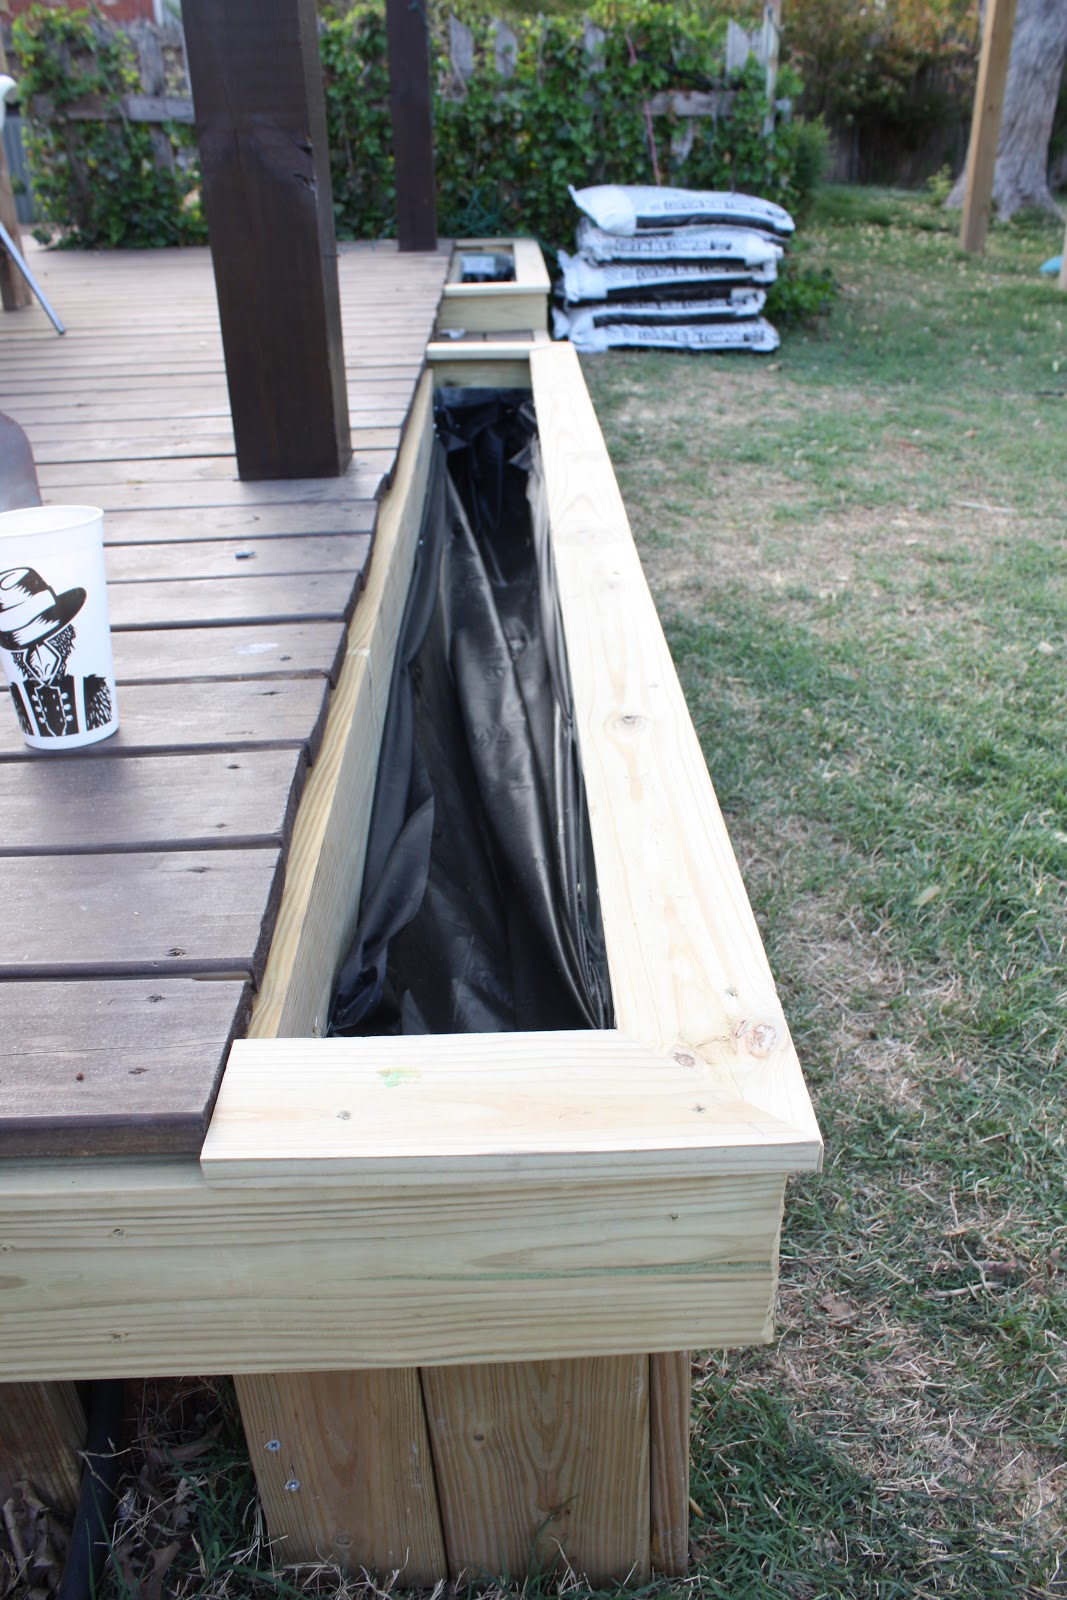
Sparky then used 1x4 boards to frame the top.  He cut each side to length with angled edges.  He then drilled each piece in to the main frame allowing for an overhang from the main frame.

Sparky also lined the planter box with a weed resistant liner.


Be sure to have a Chihuahua come sniff out your work.


Before Sparky filled the planter boxes with dirt and soil, he filled the boxes about 1/3 of the way with old glass and plastic bottles.  This will save you from having to fill the whole box with soil when the plants will only use a bit of it.


Sparky then stained the planter boxes to match the rest of the deck and pergola and then we went plant shopping!  Yay!

We ended up with 5 White Pampas and 2 Red Yuccas total.

...and a sleepy Project Manager...


I think the Red Yucca look a little space alien/creature-ish.  But Sparky LOVES them.  To each his own right?


 Voila!  New planter boxes.  I think Sparky did a pretty good job.


I apologize for my crappy instructions.  I pretty much watched for the most part and only held a board up when asked.  I'm super helpful.

 
Keep on Keepin on.