Showing posts with label Gardening. Show all posts

Saturday, June 18, 2011

Handmade Hanging Planter Boxes

A few months ago, Sparky and I were perusing one of our local greenhouses when I spotted a super cute and simple hanging planter.  I am not normally one for hanging flower planters but I really liked the one I saw that day.  It had a modern and Asian feel to it.  It was just wooden slats stacked to form a box.  The problem?  It was pricey...and I didn't really care for the flowers already in it.  I was contemplating getting it because I like it that much and I rarely like things very much.  Then Sparky set himself up by saying, "I could totally make that.  That's a rip-off."  So, I held him to it.  He made me the super simple, modern, Asian-feel hanging planters...all for free!

Luckily Sparky has a bunch of random crap laying around in our garage.  I don't know what half the stuff is and I prefer it that way.  If I start getting up all in his business then I will take control of it and it's best if I just let him have his garage crap the way it is...with a few minor must-have's and have-not's for the Mrs.  

Items used:
Wooden Stakes
Metal chain
Electrical Wire

Tools used:
Hand saw
Straight Edge
Pen
Drill
2 pliers

Sparky had a box of wooden stakes leftover from a cycling race that was just taking up space in our garage.  They were perfect for this project!  I'm sure you can find the amount of wooden pieces or stakes at your local home improvement store.  I wouldn't doubt it if these particular stakes came from Lowes or Home Depot.


Sparky started by cutting all the wooden stakes' sharp points off and also cutting the stakes to the desired size. 

Sparky then lined 15 stakes together.  He used a leveler for his straight edge to draw a straight line across all the stakes.  This line is the spot on each stake that a hole will need to be drilled.  He then repeated this step on the other end of the stakes so that there are two parallel lines.


Sparky then drilled a hole in each stake at each end where the line was drawn.  He tried to get it as center as possible on on each stake.


The next step was to start stacking the stakes in a square shape and to line up the holes as best as he could.


After the stakes were stacked to our desired height, Sparky then used the wire to snake through all the holes and tie all the stakes together.  He used pliers to cut the electrical wire.

When all four sides corners were tied, Sparky then took 5 more stakes and drilled them to the bottom of the box leaving spaces in between each stake to allow for future drainage.

Sparky had a bunch of this random metal chain laying in the garage.  He measured out the length from one corner diagonally to the other corner and guessed how much extra link would be needed to hang the planter.  He un-linked the chain (using two pliers) at the desired spot and then measured out an identical length for the other diagonal.


He then linked the chain to the electrical wire and tightened them together.  He repeated on all four corners.


Voila.

Free handmade hanging planters using materials already owned.  Sparky made a total of four boxes in about 1 hour. 

We used moss at the bottom of the planter so that dirt would not fall through the spaces.  It also gives it a nice look with little bits of moss peaking out of the little slats.

*Yes, my flowers are dying.  It's been hot and I have a black thumb.  I've moved the flowers into the shade to see if I can save the poor babies.

Keep on Keepin on.

Thursday, June 02, 2011

Herb Garden

This year I decided I wanted to try having an herb garden.  Sparky and I normally go all out with our homemade garden every Spring, filling it with various tomatoes, peppers, cucumbers and a fruit here and there.  We haven't been too lucky in the vegetable garden department since last year's hail storm wiped ours out completely and we never really recuperated our garden afterwards.  So, this year we decided to go a little lighter with only two tomato plants, some green bell peppers, banana pepper, and a cucumber plant.  I just can't give up on my cucumbers.  And then we decided to add a few herbs to see how that works out for us too.  The herbs we planted were Lemon Thyme, Italian Oregano, Sweet Basil, Curled Parsley, and English Lavender.


Sparky does such a good job of planting all of our goodies.

He's such a hard little worker.

Lemon Thyme

Italian Oregano


Sweet Basil

Curled Parsley

English Lavender

And there is always a dog to inspect sniff out the work. 

And if you are wondering what is in the hay bale...it is the tomato plants.  Sparky is testing out the hay bale idea again.  To plant your goodie of choice:

1.  Decide where in the hay bale you want to plant your goodie.  Dig out (or in Sparky's case, rip out) a hole in that place about half-way or a slightly more down the inside of the hay bale.
2.  Fill the hole with gardening soil.
3.  Plant your goodie!


Also, Sparky's sunflowers are growing like crazy!


And don't forget to feed your goodies!

Speaking of feeding...I can't wait to try some of my new herbs on a homemade pizza!  I've found the best quick and easy pizza dough recipe that I will share very soon!

Keep on Keepin on.

Friday, May 06, 2011

Planter Boxes

The Start.  You can see that Sparky had already stained the deck and the "big" pergola.  The front was left alone after the "vision" of planters popped in Sparky's head and he was determined to build large planter boxes on the front of the deck.


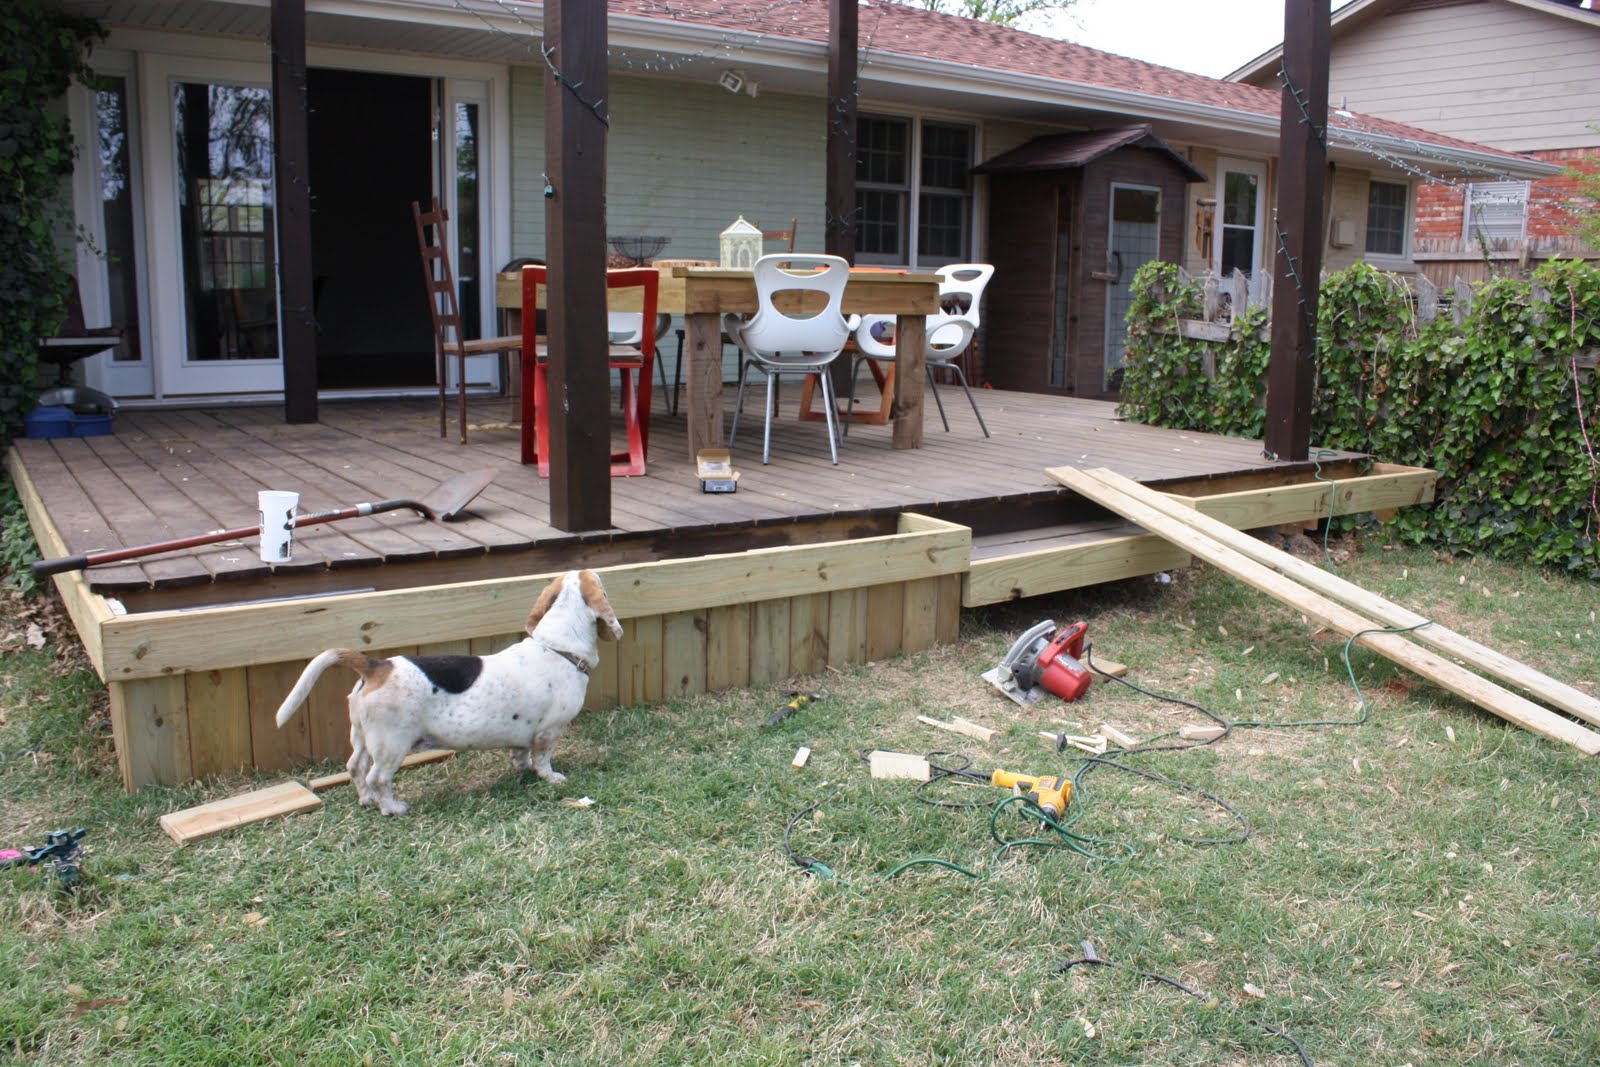
Sparky first started  by building a frame along the already existing step.  We had so much left over decking wood from the deck and pergola that we just used it for these planter boxes. 

One large piece of wood was cut to fit the exact size of the very font of the step.  The two side pieces were cut to size but also each end was cut at an angle.  Sparky drilled decking screws into the pieces to attach.


Be sure to have your Project Manager "on deck" to oversee your work as you go.  


Sparky measured and cut one piece of wood the length from one end to end.  He then cut each end at an angle to match up with the previously cut side pieces already anchored and cut at an angle.  Sparky drilled decking screws to attach the pieces.


Sparky then repeated these same steps for the left side of the deck on the other side of the step.  The left side is longer than the right side, so he was sure to measure each separately to meet each sides' specifications. 

He then started the bottoms.  The main frames of the planter boxes are floating, leaving a large space between the frame and the ground.  Sparky went back and fourth between wood and galvanized metal to fill this space.  He wanted a modern look.  The galvanized metal was a great idea, but the in the end, the wood "legs" won.  We already had the wood and the wood was more structurally supporting.  Plus, if we decide later to do the galvanized metal, we can always screw the metal into the wood and then remove again if we choose that too.  It's win win this way.

The "legs" were accomplished by just taking the long decking wood and cutting to the height needed.  It doesn't have to be absolutely perfect because they will eventually be covered at the top.

You can also see here that Sparky is attaching a back deck board to close of the box in the back.

Be sure your Project Manager approves all decisions.  They have to at least feel involved throughout the process.


Be sure to make a mess.


Take a break without informing your Quality Control Manager.  Leaving them dumbfounded about your whereabouts is always fun.


Repeat the bottom slats to the other side.


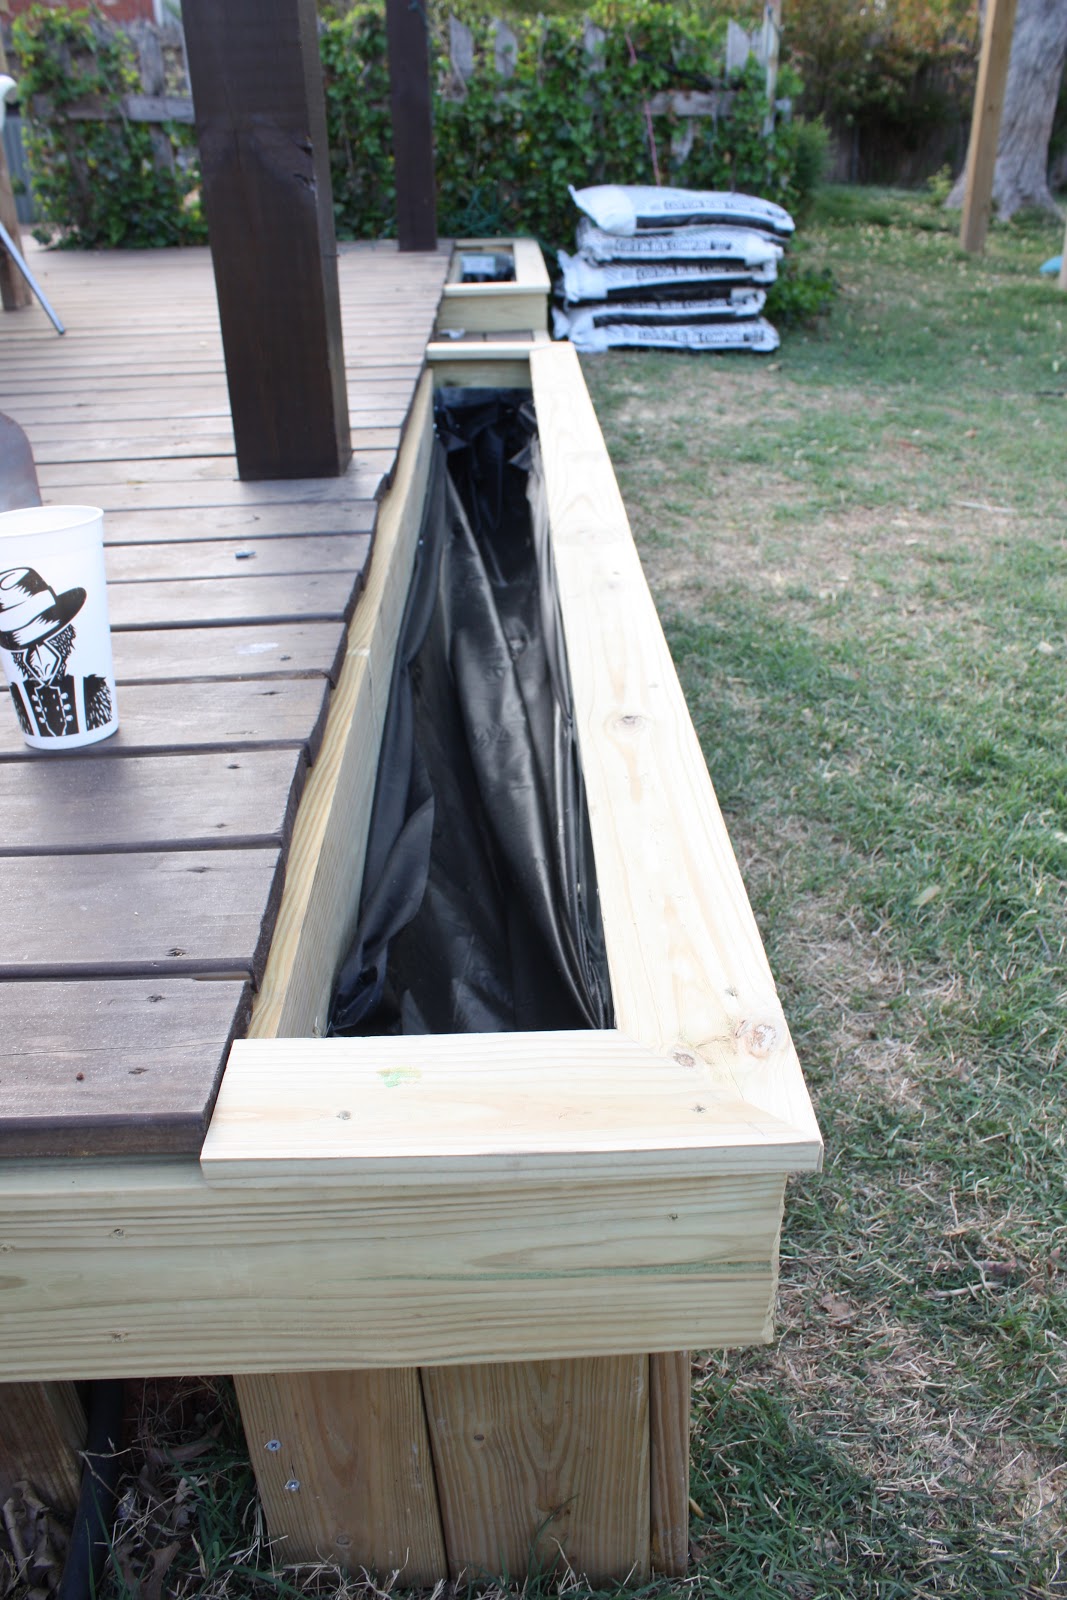
Sparky then used 1x4 boards to frame the top.  He cut each side to length with angled edges.  He then drilled each piece in to the main frame allowing for an overhang from the main frame.

Sparky also lined the planter box with a weed resistant liner.


Be sure to have a Chihuahua come sniff out your work.


Before Sparky filled the planter boxes with dirt and soil, he filled the boxes about 1/3 of the way with old glass and plastic bottles.  This will save you from having to fill the whole box with soil when the plants will only use a bit of it.


Sparky then stained the planter boxes to match the rest of the deck and pergola and then we went plant shopping!  Yay!

We ended up with 5 White Pampas and 2 Red Yuccas total.

...and a sleepy Project Manager...


I think the Red Yucca look a little space alien/creature-ish.  But Sparky LOVES them.  To each his own right?


 Voila!  New planter boxes.  I think Sparky did a pretty good job.


I apologize for my crappy instructions.  I pretty much watched for the most part and only held a board up when asked.  I'm super helpful.

 
Keep on Keepin on.

Monday, April 18, 2011

A Task Filled Weekend and A Treat

Sparky and I mostly Sparky accomplished a lot off of our "to-do" list this past weekend.  I can't wait to share the photos of all the goods.  For now, here is a list to get you excited:

  1. Cleaned the house (not too exciting; but very necessary)
  2. Got some new "grasses" that are drought tolerant to put in our newly finished planter boxes attached to the deck!!!  Huge accomplishment.
  3. Finished staining the small pergola!
  4. Prepared another raised planter box for herbs or in Sparky's words, "whatever you choose to throw in there"...
  5. Checked out the OKC Farmer's Market.   
  6. Got our grocery shopping done for the week.
  7. Walked around the Plaza district and checked out an awesome retro store...called RetroOKC.  Super cool.
  8. Got a couple of Green Goodies Cupcakes.  yum.


Keep on Keepin on.

Purple and Full of Pride

One of my very many many goals in life (and trust me, there are a plethora; note to self:  blog post on goals), is to be a photoshop wizard.  Now, whether that be self taught or taking a class or just in my dreams, this photoshop wizardry will be accomplished someday and somehow.

I play a lot in photoshop and accomplish very few ah-ha moments.  (note to self:  have more ah-ha moments).  I also purchased way back when not too long ago a Photoshop for Dummies book...which I have yet to start finish perusing.

The other day I took pictures of my one lone little tulip growing proudly in a very sad and dry, red clay consumed, dearth of happiness corner.  Purple and full of pride she was.

So, I delicately primped her up in photoshop and was pretty happy with the results. 


And then, a friend showed me how to place to photos side by side.  Aha!  My first photoshop aha moment! Well, at least that I can remember!  It's not rocket science or anything, but I was pretty darn happy with the event!
Before (left) and After (right)

So, I quickly did one more little photo primping and ended up with the following result.  A little curving, contrasting, and saturation and...voila.

The difference is a bit more subtle than the first tulip but there is a difference! 
Before (Top) and After (Bottom)

I may not be purple like my pretty little tulip, but I am full of pride of my tiny aha moment.

Keep on Keepin on.

Friday, April 15, 2011

Macy

Sparky was making his hanging planter boxes this past weekend when I snapped this cute little pic of our Macy girl.  I can rarely get a cute photo of Macy so this was extra special that I finally got one that wasn't all blurry.  Plus, of course, there are all the beer bottles in the planter as well.  Makes for a good photo if you ask me!

Have a beautiful weekend!

Keep on Keepin on.
Wednesday, April 06, 2011

Sparky and His Sunflowers

Sparky loves him some Sunflowers.  I know.  Random. 

As Spring has arrived, Sparky and I have been anxious to pretty up our yards once again.  We love planting and gardening and building a better home and Spring has shown to be the time when we get all "ba-jig-adee"...yeah.  bajigadee.

Our recent trips to TLC and Lowes have brought us colorful and sustainable plants and flowers.  I finally got my daylilies and succulants, while Sparky got more green and ground coverage.  I'm always screaming "I want color!" while Sparky always wants more "green" or grasslike plants.  Which, don't get me wrong, I love green and grassy stuff but dang it..."I NEED COLOR!!"

Anyway, the one colorful flower Sparky L.O.V.E.'s is a sunflower.  Me?  I'm not too much of a fan of the sunflower but I can tolerate them if it allows for some dang color.  Beggers can't be choosers, right?  So, he picked up some little bags of sunflowers seeds during one of our trips to Lowes. 

This year we've decided to move our vegetable garden when the time comes to plant those little gems.  So, we went ahead and tossed the little sunflower seeds in one straight long line in the old raised beds along our East fence in the backyard.  This area gets so much sun! 

These little guys are amazing.  They've already started sprouting!  They've only been in the ground for about a week and a half and are doing amazing even though Ruby keeps digging them up.  grrr.


I love that the shells are still holding on!


Peek-a-boo

Ruby thinks this is her play area.  The Jaws song warning of a dangerous shark approaching always comes to mind when I see her approaching restricted territory.


Project post coming soon:  Sparky's floating flower beds.

Keep on Keepin on.